Confirm the Download Source
Legacy builds are more likely to be repackaged. Confirm the source, file name and version information before installing.
Safe download guideClash for Windows is a Legacy GUI client for Windows / macOS. Follow these steps to import a subscription URL, update the profile, choose a node and enable proxy mode.
Before following the tutorial, confirm the installer source, package format, subscription URL and required system proxy or VPN permissions.
Legacy builds are more likely to be repackaged. Confirm the source, file name and version information before installing.
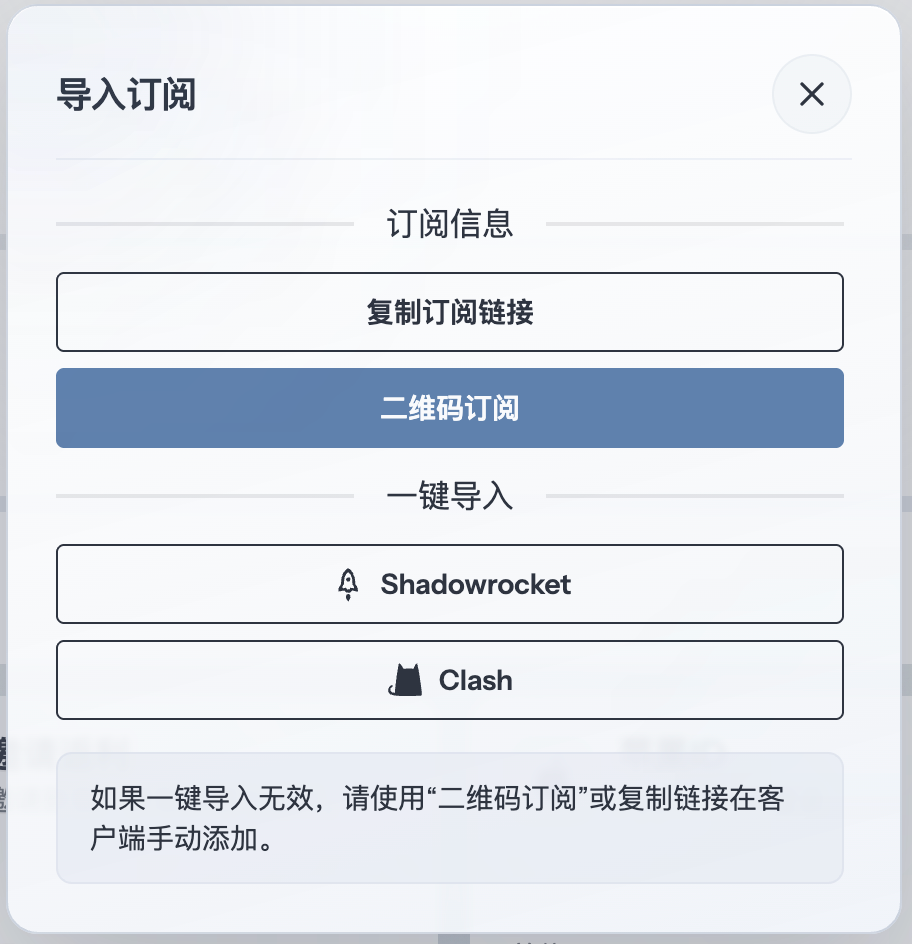
Safe download guideSubscription URLs are usually provided by your service provider. Copy the Clash format URL and download the profile in the client.
Subscription tutorialNew users should compare Clash Verge Rev, FlClash and Clash for Windows before deciding to keep using the legacy client.
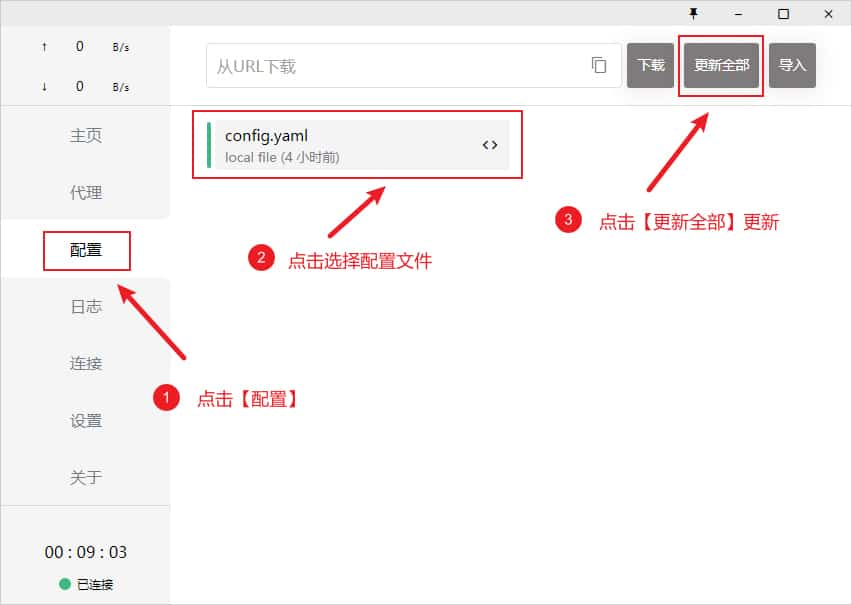
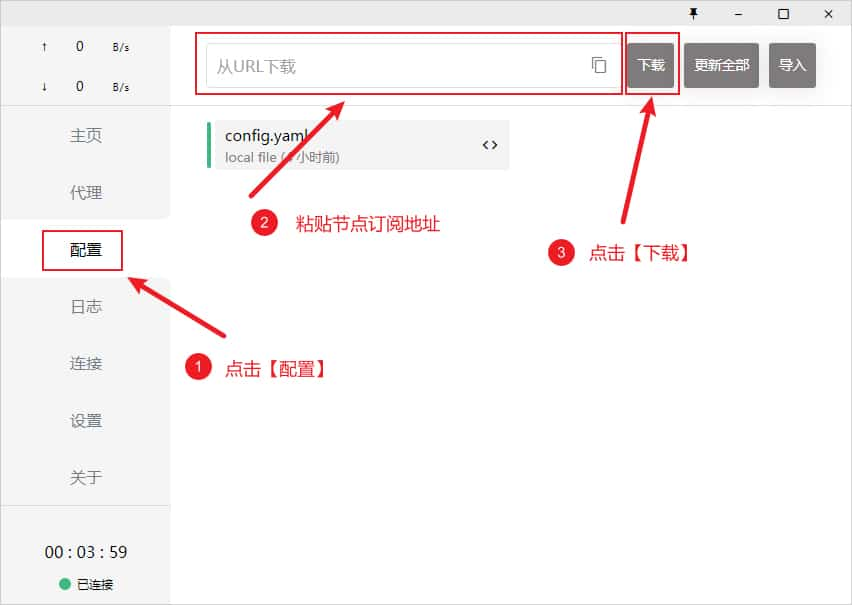
Compare clientsOpen the profile, configuration or subscription entry in Clash for Windows. Paste the copied subscription URL into the URL field, then save, download or import the profile according to the client prompt.
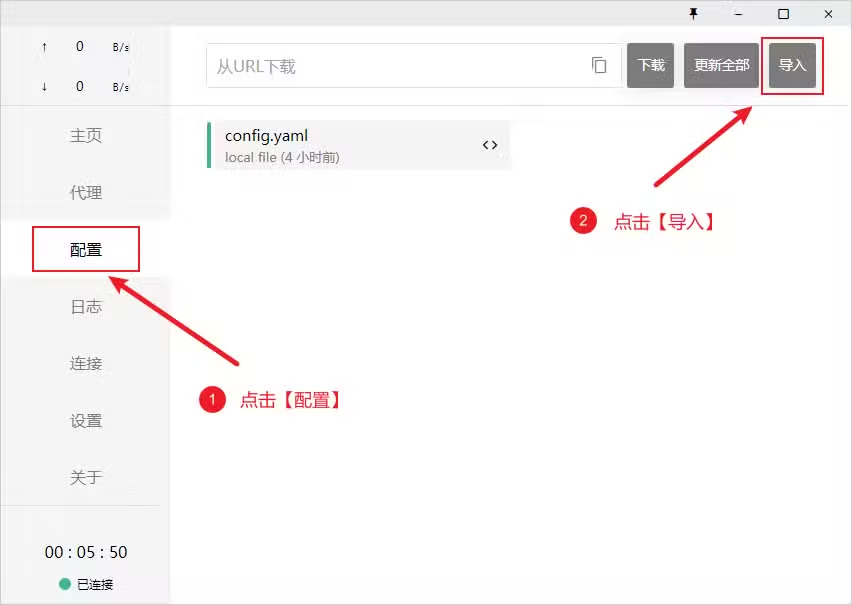
If the client also supports local files, use that only when URL import is unavailable or your provider explicitly gives a YAML file.
Open the proxy or policy group view and choose an available node. Pick a node based on region, latency and the service you need to access.
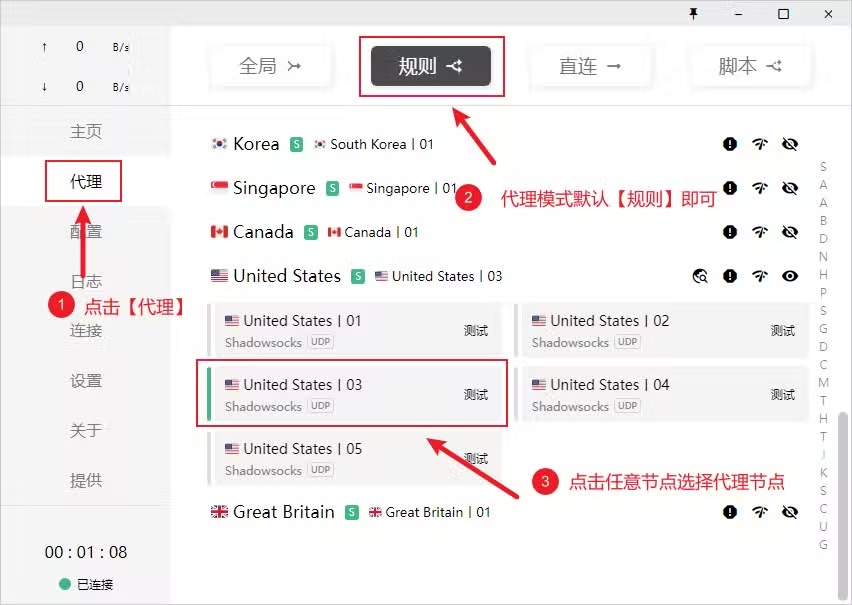
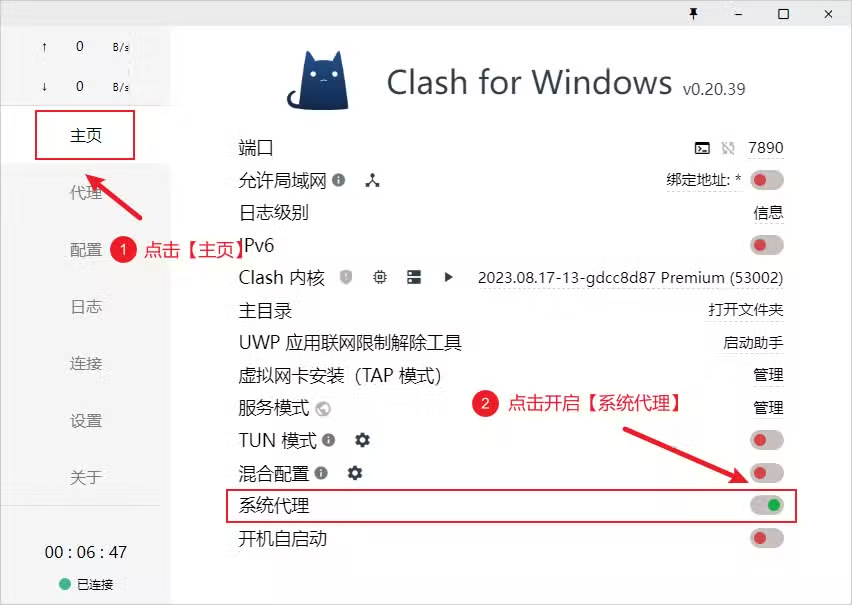
Enable the proxy switch shown in the screenshots. Desktop clients usually use System Proxy, while mobile clients may request VPN permission the first time.
After it is enabled, traffic is forwarded through the Clash for Windows profile.

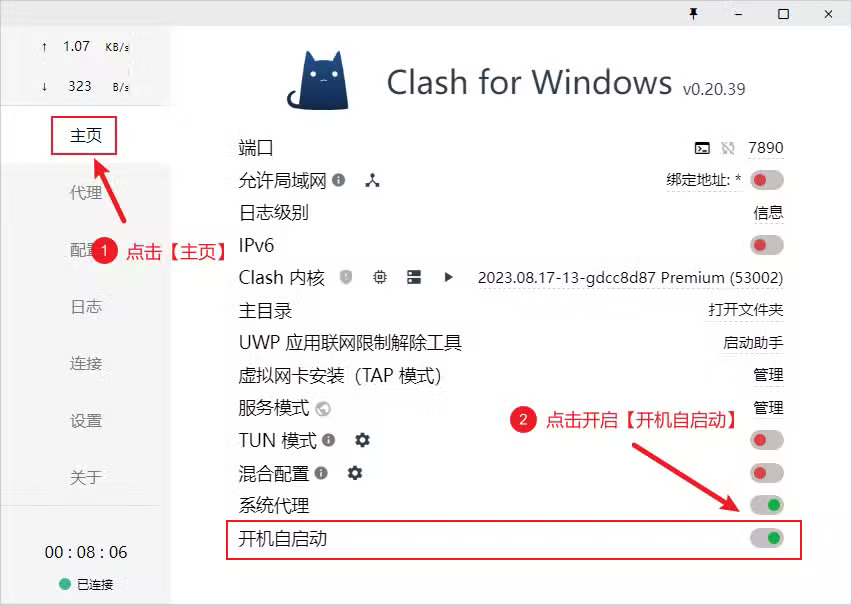
Enable the start-on-boot switch in the home or settings page if you want Clash for Windows to launch automatically after system startup.
Use the profile update action to refresh all remote profiles. This pulls the latest nodes, policy groups and rules from your provider.